Integration Steps
Customer Experience Journey
The customer journey for activating integration with a POS integrated with Pay Instore API are:
- Authorise the POS Partner to integrate with your Tyro Account/s (MID) via Tyro's Integration Portal
- Enable integration on each Tyro Pro to be used as an integrated terminal
- Pair each terminal so that the POS is able to drive the terminal
Step 1: POS Partner Authorisation
This new style of integration introduces an authorisation model where the Merchant authorises POS Partners and once autorised, the POS can drive the integration.
This authorisation takes place via Tyro's Integration Portal.
The partner is expected to make a link available to merchants that directs them to the correct page on the Integration Portal. The format of the URL is:
Deep link URL: https://integrate.tyro.com/pay-instore?posId=[client_id]&posReference=[pos_reference]
Where:
- The posId is the production client_id provided during onboarding.
- The posReference is (typically) a customer reference of yours that allows you to map Tyro MIDs that are included in authorisation notifications with your customer reference.
When merchants follow the link, they will sign in using their Merchant Portal credentials (they will need to have a System Admin role to Authorise a POS Partner). Once signed in, the page will show the name of the POS Partner being authorised in the top left corner (example screen shots below). They will also see their Tyro Merchant IDs (MIDs) listed. Finally, they select the MID/s they would like to authorise for the POS Partner to use and press the blue Authorise selected MIDs button.
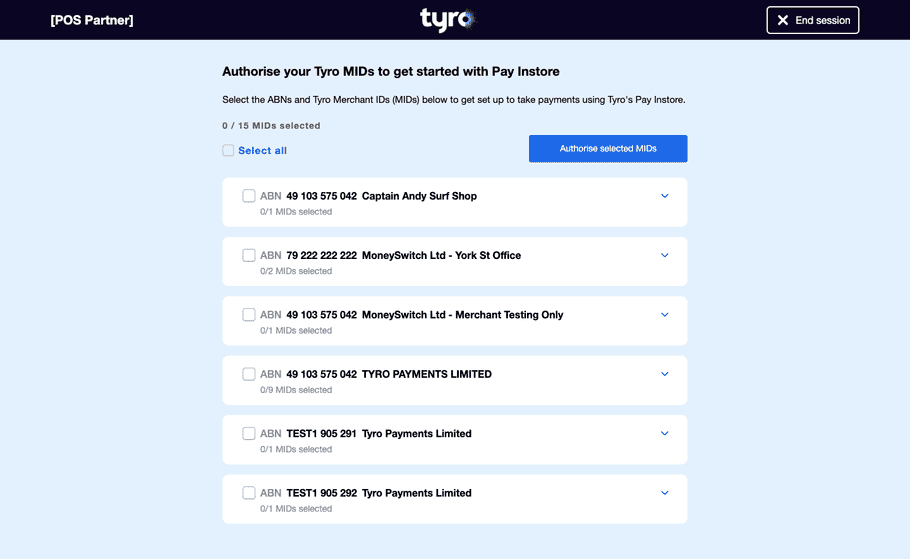
Figure 1: Integration Portal - Welcome Page
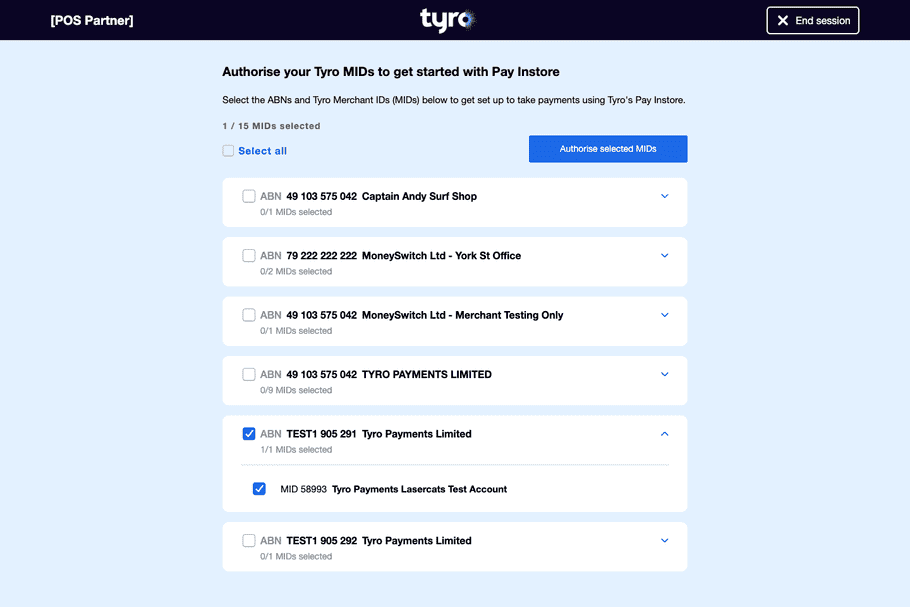
Figure 2: Integration Portal - Selecting MID/s
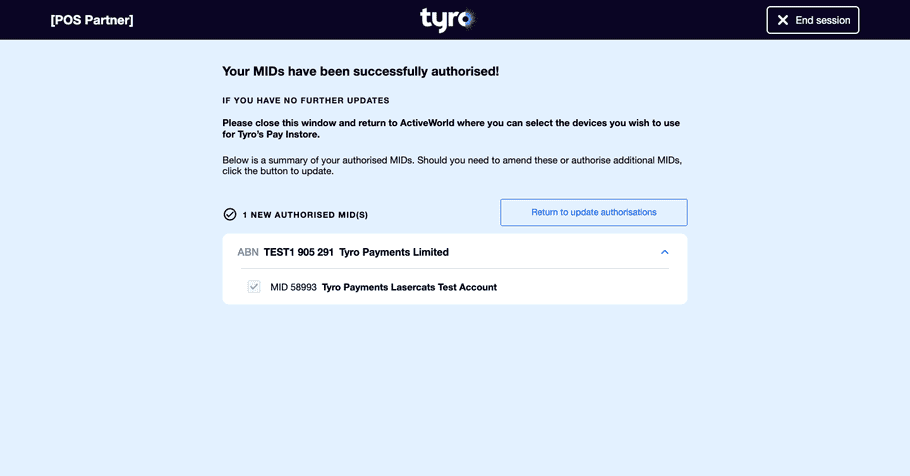
Figure 3: Integration Portal - MID/s authorised
Step 2: Enable Integration on the Tyro Pro
Extracted from Tyro help docs: https://help.tyro.com/s/article/How-to-change-the-integration-mode-on-the-Tyro-Pro-EFTPOS-machine
- On the payments home screen of the Tyro Pro EFTPOS machine, tap the waffle menu in the top left corner
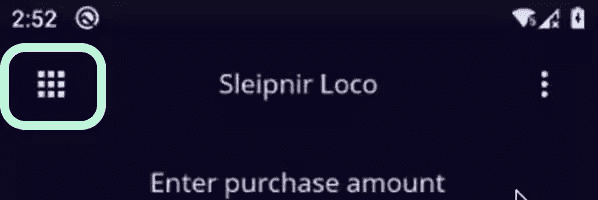
- From this new screen, tap the hamburger menu in the top left corner of the screen to show the main menu

- Open the Settings menu
- Enter the Admin password
- Scroll down to the POS Pairing section of the menu
- Tap the Mode menu option
- Select Integrated from the menu options
The terminal is now in Integrated mode and is set to wait for transaction requests from the POS.
Step 3: Pair with the Tyro Pro
Pairing is the process where we connect the terminal to the POS. It involves an activity on the Integration Portal AND the Tyro Pro.
Back on the Integration Portal, now that your MID has been authorised, you will see a blue Pair Terminal button next to the MID (example screen shot below). Click the Pair Terminal button and it will bring up a dialogue box (example screen shots below).
Back on the terminal, from the POS Pairing menu, select Pair with POS. See Step 2 for how to get to the POS Pairing section if necessary. Type the Terminal ID (TID) shown on the terminal screen into the Pair a Terminal dialogue box in the Integration Portal. Press the blue Pair Terminal button.
Back on the Tyro Pro terminal, press the Start button to complete the pairing process.
If successful, the Pair a Terminal dialogue box will show a green Success message. If a red Failed message appears, check the details in the above steps and try again.
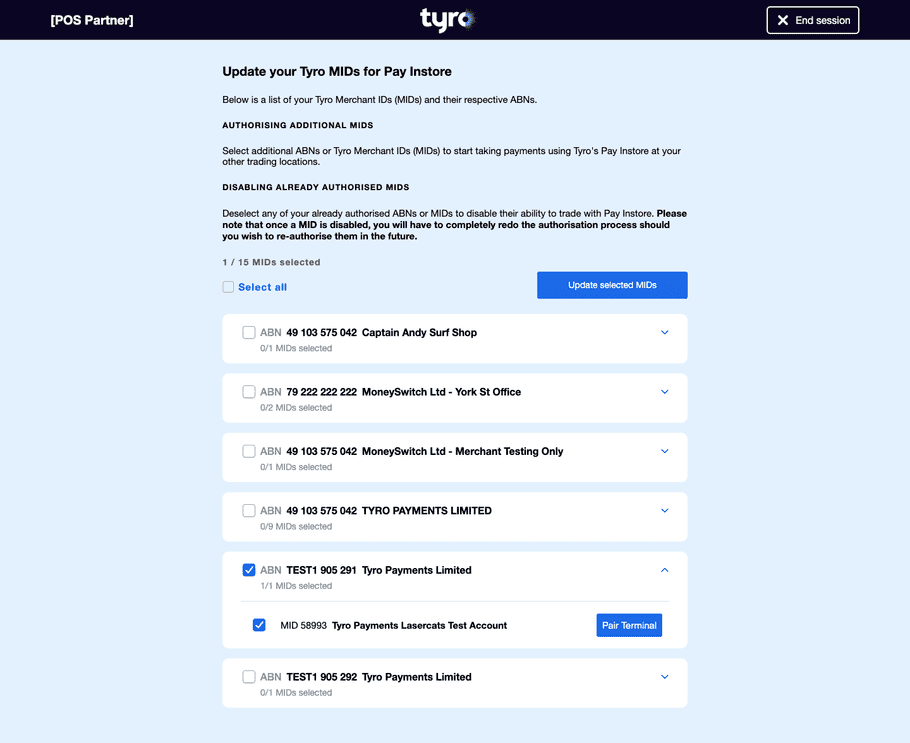
Figure 4: Integration Portal - Getting Ready to Pair
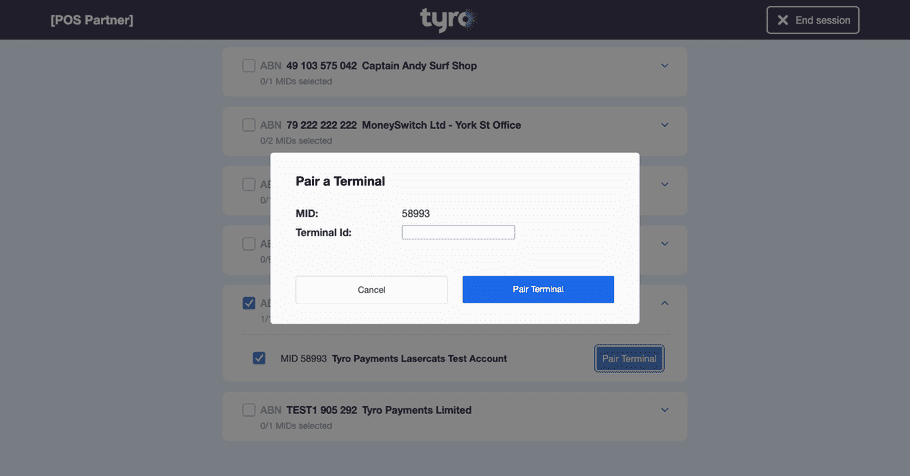
Figure 5: Integration Portal - Pairing with a Tyro Pro
Repeat steps 2 and 3 for each terminal to be available as an integrated terminal.